Mudanças entre as edições de "ESTE: UART - Interrupts and Circular Buffer"
Ir para navegação
Ir para pesquisar
| Linha 42: | Linha 42: | ||
==Solutions== | ==Solutions== | ||
| − | *[https://drive.google.com/open?id=0B_chZ- | + | *[https://drive.google.com/open?id=0B_chZ-d1CkpCa1lhaEczNjZvOVE C - AVR] |
| − | *[https://drive.google.com/open?id=0B_chZ- | + | *[https://drive.google.com/open?id=0B_chZ-d1CkpCSUdnN0VnNEJsb1E Arduino UNO] |
==Tools== | ==Tools== | ||
Edição das 09h15min de 15 de outubro de 2015
This experiment is part of this project.
To complete this experiment it is recommended to see at first the UART - Basic Interrupts script.
Pseudo code
Let's begin with a solution. The pseudo code (actual coding is up to you) is below:
int main(void) {
    byte incomingByte;
    baud_rate = 9600;
    while(1) {
        led_off();
    }
    return 0;
}
void serial_interrupt_event() {
    if (data_available_on_input_field()) {
        incomingByte = read_data_on_input_field();
        println(incomingByte);
        led_on();
    }
}
This pseudo-code has a comparison statement to check if there are data available on the input field of the serial monitor, i.e serial port. If so, the data available will be stored on the memory, printed - only for debuging- and the led will be lighted on.
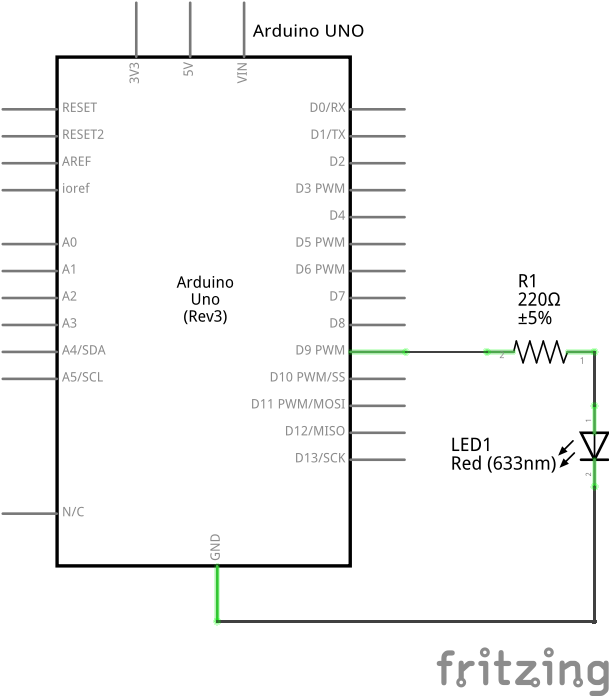
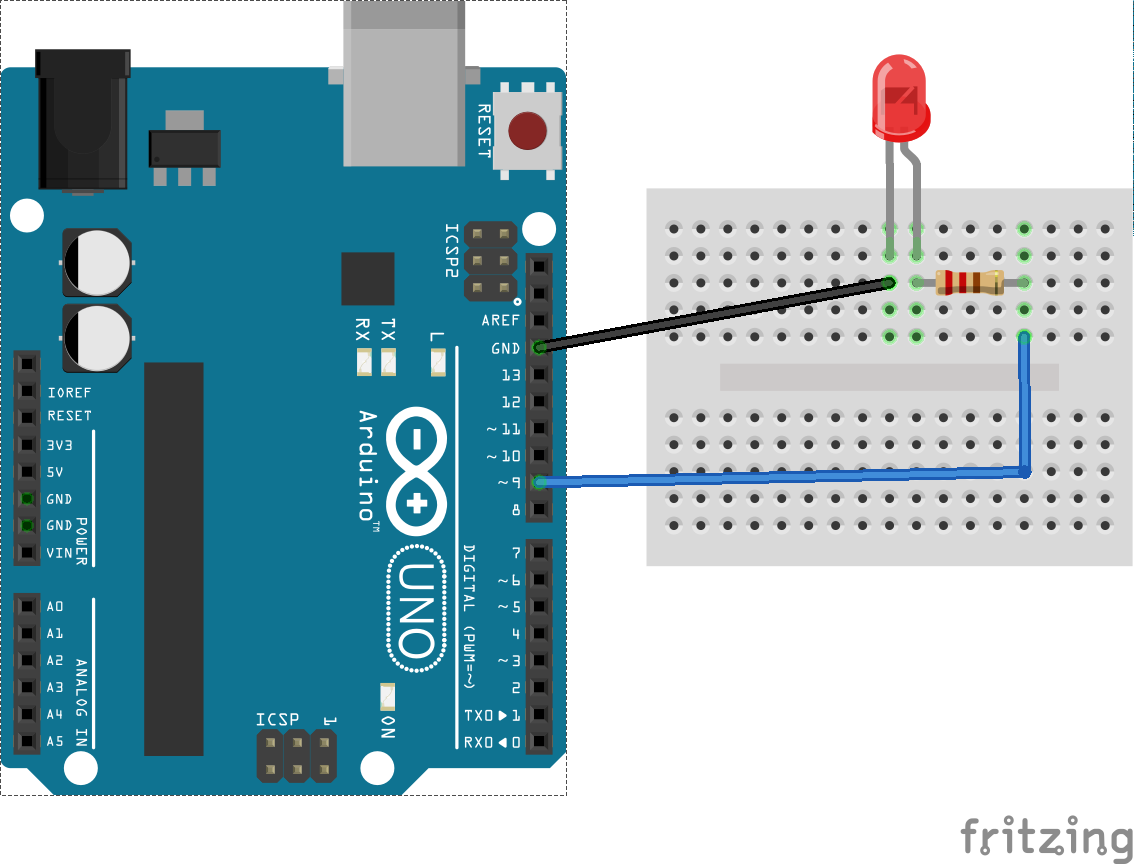
Schematic
Part List
- 1 LED
- 1 220 ohm resistor for the led
- 1 Protoboard
- 2 copper wires (tinned) or jumpers

